Step-by-Step Guide to Planting a Bare-Root Tree
Planting a bare-root tree requires careful attention to timing, soil preparation, and handling of the roots. Unlike container-grown trees, bare-root trees are dug up while dormant and sold without soil around their roots. This method offers several advantages, including lower cost and a wider variety of species, but it also demands immediate and proper planting to maximize the chances of establishment.
The process begins before the tree even arrives. Understanding the specific needs of the species and the local climate is essential. Bare-root trees are typically planted in late winter or early spring, while the tree is still dormant. This timing allows the roots to establish before the tree breaks bud and begins active growth. By following a systematic approach, from preparation to aftercare, you can give your tree the best possible start in its new environment.
This guide outlines the key steps, from hole preparation to initial watering, with an emphasis on correct techniques that promote root development and long-term health. It is designed to be practical and informative, helping both novice and experienced gardeners achieve successful planting outcomes.
Preparing for Planting
Before you begin digging, it is important to gather the necessary tools and ensure that the soil conditions are suitable. The planting site should receive appropriate sunlight for the specific tree species, and the soil should have good drainage. If the area is prone to waterlogging, consider planting on a slight mound or improving drainage before proceeding.
Start by clearing the planting spot of grass, weeds, and debris. A circle about three feet in diameter is often sufficient to reduce competition for water and nutrients. This initial preparation also makes it easier to dig the hole and inspect the soil structure. If the soil is compacted or heavy, you may need to loosen it to a greater depth, as bare-root trees benefit from soil that allows their roots to penetrate and expand easily.
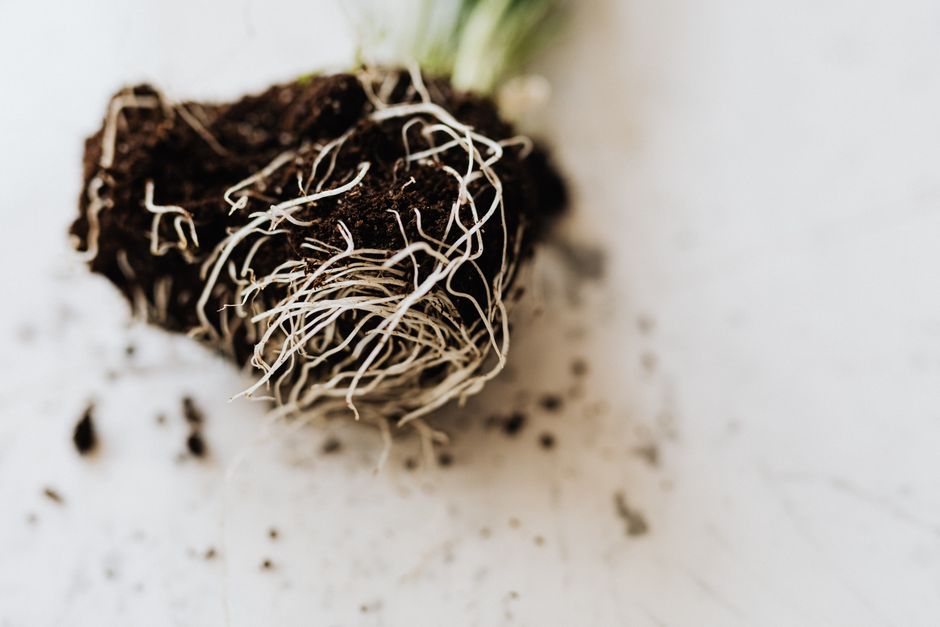
While you are preparing the site, keep the tree’s roots moist. Bare-root trees should not be allowed to dry out. If they have arrived wrapped in damp material, keep that moisture intact. If the roots have dried during transport, soaking them in water for a few hours before planting can help rehydrate them, but do not soak for more than a day.
Another critical step is inspecting the tree. Remove any broken, damaged, or dead roots with clean, sharp pruning shears. Also, trim any excessively long roots, as they can sometimes become kinked in the planting hole. Healthy roots should be firm and pliable. This inspection helps ensure that the tree puts its energy into new growth rather than repairing old damage.
Choosing the Right Location
Selecting the correct planting location is a long-term commitment. Consider the mature size of the tree, both its canopy and root system, and ensure it will have adequate space to grow without interfering with buildings, power lines, or other structures. The soil in the chosen area should be well-drained; if you are unsure, you can test it by digging a small hole and filling it with water to see how quickly it drains. A hole that takes more than a few hours to drain may indicate poor drainage, which could be problematic for bare-root trees.
It is also beneficial to consider the surrounding environment. Areas with strong wind exposure may require staking or additional protection. The presence of nearby trees or shrubs can affect sunlight availability and root competition. Taking these factors into account during the planning phase can prevent future issues and reduce the need for corrective measures.
Digging the Planting Hole
The dimensions of the planting hole are crucial for the success of a bare-root tree. The hole should be wide enough to accommodate the roots without bending or crowding them. A general rule is to make the hole at least twice the diameter of the root spread, and in some cases, three times is preferable. This generous width encourages roots to grow outward into the surrounding soil, which establishes a stable foundation.
In terms of depth, the hole should be only as deep as the root system, ensuring that the tree sits at the same level it was grown in the nursery. Look for the root flare, the point where the trunk begins to swell and the roots start to emerge. This flare should be above the soil line after planting. Planting too deep can lead to stem rot and other issues, while planting too shallow can expose the roots and cause them to dry out.
When digging, set the soil aside in a pile. It is not necessary to amend the soil with compost or fertilizer at this stage, as modern research suggests that backfilling with the native soil is often best. Adding amendments can create a ‘potting soil effect’ that discourages roots from venturing into the surrounding soil. If the soil is extremely poor, you might consider broadcasting a slow-release fertilizer on the surface after planting, but this should be done cautiously and only if soil tests indicate a deficiency.
Measuring Proper Depth
To measure the required depth, you can insert a straight stick or the handle of your shovel across the hole to act as a level guide. Place the tree in the hole, and adjust the soil at the bottom until the root flare sits just above the level of the surrounding ground. It is easier to make adjustments before backfilling than after. Some gardeners create a mound in the center of the hole and spread the roots over it, which can help support the tree and ensure good root distribution.
Placing the Tree and Backfilling
Before placing the tree, it is a good idea to hold the tree upright and inspect the roots once more. Gently spread the roots in the hole, taking care not to bend them sharply. If some roots are angled upward, they will need to be pruned or the hole may need to be altered. The goal is to have the roots radiating outward in a natural arrangement.
Begin backfilling the hole with the soil you set aside, working systematically around the roots to eliminate air pockets. It can be helpful to have another person hold the tree steady while you backfill, or you can use a stake to keep it straight. As you add soil, gently firm it with your hands or foot. The soil should be loose enough to allow root movement but firm enough to support the tree.
When the hole is about half full, water it thoroughly to help settle the soil around the roots. This step helps remove any remaining air pockets. Continue backfilling until the hole is filled, and then create a slight berm or saucer around the tree to hold water. This temporary structure can help direct irrigation to the root zone during the establishment period.
Do not tamp the soil excessively, as overly compacted soil can hinder root growth. Instead, you can water again lightly to settle the soil further. After backfilling, the tree should stand upright on its own if properly planted. If the tree is wobbly, it may need staking, but staking is often not necessary unless the site is windy or the tree is top-heavy.
Root Orientation and Spread
Proper root orientation is key. The lateral roots should be spread horizontally, not wrapped around the trunk. If there are any circling roots, they should be pruned away, as they can later strangle the tree. When placing the tree in the hole, ensure that the graft union (if present) is above the soil line. For seedling trees, the root flare should be clearly visible.
After backfilling, check the depth again by visually aligning the root flare with the surrounding soil surface. If needed, adjust the height before the soil settles completely. It is easier to correct this during planting than later on.
Initial Watering and Mulching
Initial watering is a critical step for bare-root trees. After planting, give the tree a thorough watering, applying water slowly to allow it to penetrate deeply. The goal is to moisten the entire root zone, which may require more water than a typical garden plant. A slow, steady stream from a garden hose is more effective than a quick drench, as it reduces runoff and encourages deep moisture penetration.
Watering should be done immediately after planting, even if the soil is already moist. This helps settle the soil and ensures that the roots have access to moisture. The amount of water depends on soil type. Sandy soils will require more water, while clay soils may hold moisture longer. As a general guide, the soil should feel moist to the touch, but not waterlogged.
Mulching around the base of the tree helps conserve soil moisture, regulate soil temperature, and suppress weeds. Apply a layer of organic mulch, such as wood chips or shredded bark, about 3–4 inches deep. Keep the mulch a few inches away from the trunk to prevent moisture from accumulating against the bark, which could lead to rot. Mulch should be spread in a ring that extends at least a few feet from the trunk or the same diameter as the planting hole.
After the initial watering, you may not need to water again immediately unless the weather is particularly dry or windy. The key is to monitor the soil moisture over the following weeks, adjusting your watering schedule based on rainfall and temperature. Newly planted trees typically need watering once or twice a week during the first growing season, but this can vary widely depending on local conditions.
Successful establishment depends on many factors, including proper planting, consistent moisture, and appropriate environmental conditions. While this guide aims to provide a solid foundation, outcomes are influenced by variables such as soil health, climate, and subsequent care.
Aftercare and Monitoring
The weeks following planting are crucial for the tree’s survival. During this period, the tree is adjusting to its new environment and beginning to grow new roots. Consistent moisture is essential. Check the soil regularly, especially during hot or dry periods. When you water, apply enough water to moisten the soil to a depth of at least a foot, encouraging roots to grow downward.
Controlling weeds around the base of the tree is also important, as weeds compete for water and nutrients. Mulching helps, but you may also need to hand-pull weeds that emerge. Avoid using herbicides near young trees, as they can potentially damage the tree. A layer of mulch can be replenished as needed to maintain its thickness.
Pruning after planting is usually limited to removing broken or dead branches. Major pruning should be delayed until the tree has had time to establish, typically after the first growing season. This allows the tree to allocate energy to root development rather than regrowing pruned limbs.
Fertilizing newly planted bare-root trees is generally not recommended until the second year, unless soil tests indicate a deficiency. Over-fertilizing can burn roots or stimulate top growth at the expense of root development. If you do choose to fertilize later, use a balanced, slow-release formulation and follow the manufacturer’s instructions.
In areas with strong winds or animal pressure, additional protection may be necessary. Staking can provide support, but it should be done in a way that allows the trunk to sway slightly, which promotes stronger trunk development. Remove stakes after the first year to avoid girdling. Protective tree guards can be used to prevent damage from mowers and rodents.
By following these steps and remaining attentive during the establishment phase, you can give your bare-root tree a strong start. Continuous monitoring and responsive care are key factors that influence the tree’s long-term health and growth.